Conference Badge Design: 7 Steps to Create and Print
Conference badges do more than identify attendees. They set the tone at check-in, help people find each other on the floor, and carry your brand for the entire event. Get them wrong, and you’ll feel it in the first ten minutes of day one.
The problem? There are more printing methods, materials, and design tools than anyone has time to sort through. Some teams professionally pre-print their badges and then spend the opening morning sorting piles behind the reg desk. Others spring for expensive thermal printer rentals so they can take a hands-off approach with a full-service vendor. The right answer depends on what your event actually needs.
This guide walks through the complete badge design and printing process in seven practical steps. You’ll learn which printing methods work best for different event sizes, how to choose materials that balance durability with cost, and which design elements actually help attendees network more effectively.
Whether you’re planning a 50-person workshop, a 500-person summit, or a 5,000-attendee conference, trade show, or association meeting, you’ll find a clear path to creating badges that work.
⏲️The Quick Version:
- Pick the right printing method for your event’s scale and complexity. Preprinting, onsite label printing, and direct thermal printing each carry very different operational costs.
- Design for readability first, networking second. Oversized first names, high contrast, and the back of the badge do more to drive interaction than any single graphic choice.
- Treat check-in as the opening act. A smooth badge pickup sets the tone for the rest of the event.
One thing to settle first: for small internal meetings or workshops with fewer than 100 attendees where everyone already knows each other, a digital badge (a QR code delivered via email or an event app) may be all you need. If physical badges are the right call, this guide walks through the full production process.
Step 1: Choose Your Badge Printing Method Based on Event Scale
For events that require physical badges, three production methods dominate: preprinting badges off-site, onsite label printing on pre-branded badge stock, and direct thermal printing that generates the entire badge onsite. Each fits a different event profile. The right choice depends on three factors: how many attendees you expect, how stable your registration list is, and how much control you need over last-minute changes.
| Method | Best For | Setup Complexity | Cost Profile |
|---|---|---|---|
| Pre-printing | Events with a locked-in guest list, or badges that ship to attendees in advance | High: pre-event sorting, contingency station, extra stock | Low hardware, high labor |
| On-demand Onsite Badge Printing | Most professional conferences and summits (100 to 10,000+ attendees) | Low: kiosk, label printer, test print, ready | Predictable flat per-event pricing |
| Direct thermal printing | Very large trade shows and consumer shows (5,000+ attendees) with complex credentials | High: specialist required for setup and event support | Highest overall once technician costs are included |
Pre-Printed Badges (Small or Pre-Shipped Events)
Pre-printing event badges means producing every badge in advance, off-site, and shipping them to the event for distribution. It fits two specific scenarios: small events (50 or fewer attendees) with a fully finalized guest list, or events where badges are mailed to attendees before arrival (VIP-only summits, member-exclusive galas).
The catch shows up on event day. Pre-printed badges take hours to alphabetize and lay out at the reg desk, leave every name and company on display while your team does it, and turn every walk-in into a manual fix.
On-Demand Onsite Badge Printing: The Professional Standard
On-Demand Onsite Badge Printing combines firm laminate branded badge stock with labels printed onsite with the attendee information. When an attendee checks in, their name, company, title, and QR code are printed on a sticker label and applied to the badge in seconds. EventMobi’s BadgeON™ software is one of the most popular tools for this, and onsite on-demand badge printing is now the default at most professional conferences.
This method works for events with 100 to 10,000+ attendees. You maintain complete brand control with pre-printed, firm laminate branded badge stock, while retaining flexibility for walk-ins and registration changes. Hardware is light (a label printer costs $300–$500), and the system integrates directly with your registration platform for automatic data syncing. For most professional events, this approach balances cost, quality, flexibility, and speed better than the alternatives.
Direct Thermal Printing (High-Volume Trade Shows)
Direct thermal printing creates complete, fully customized badges in real time as attendees check in. The entire badge design, including branding, attendee details, and QR codes, prints on demand using specialized thermal printers. It’s built for specific scenarios: very large trade shows and consumer shows with 5,000+ attendees arriving in concentrated waves, multi-day conferences with complex access tiers, or events where badge personalization extends to session schedules or sponsor-variable layouts.
The investment is significant. Depending on the number of attendees, you’ll need multiple units to handle peak check-in volume. For a multiday event with three stations, expect rental packages starting at USD $15,000. Thermal printers are complicated, so vendors almost always send a technician to set them up and run them during the event. Between technician day rates, travel, and higher per-badge costs, thermal is the most expensive option. For a standard conference, on-demand onsite badge printing delivers the same attendee experience at a fraction of the complexity and cost.
Step 2: Select Badge Materials That Match Event Duration and Environment
Badge material decides how your badges hold up after eight hours of wear. Paper badges work fine for a two-hour breakfast meeting, but by day three of a conference, they look worn and unprofessional. The right material choice balances durability, sustainability, and budget.
Paper Stock: Short Events Only
Standard paper badges (typically 32lb cardstock) are the most economical option and the least durable. They’re suitable for single-day events lasting less than six hours, particularly indoor events where badges won’t be exposed to moisture or heavy handling.
Paper is the most sustainable choice. It’s fully recyclable and biodegradable, making it appropriate for organizations with strong environmental commitments. The trade-off is appearance. Paper badges crease easily, absorb moisture from humidity or spilled drinks, and quickly develop a worn look.
Use paper badges for internal company meetings, short workshops, or any event where attendees won’t need to reference their badge repeatedly throughout the day. Avoid paper for multi-day conferences, outdoor events, or situations where badges serve as ongoing access credentials.
Firm Laminate Branded Badge Stock: The Default for Multi-Day Events
Firm laminate branded badge stock is the recommended choice for most professional events. This material consists of a paper core encased in thin plastic lamination, creating a badge that’s lightweight, durable, and cost-effective.
Laminated badges resist creasing, moisture, and general wear. They maintain a crisp, professional appearance throughout multi-day events. The material accepts both inkjet and thermal printing clearly, ensuring text remains sharp and QR codes scan reliably. Cost is moderate, typically $0.50-$1.50 per badge, depending on order volume.
This material works for conferences lasting one to five days, indoor and outdoor events, and situations where badges need to withstand repeated handling (such as events with multiple security checkpoints). The lamination provides enough structure that badges hang properly on lanyards without curling.
Firm laminated branded badge stock strikes the optimal balance between durability, appearance, and cost for professional events. It’s the default choice unless specific circumstances require either paper (for sustainability) or hard PVC (for extreme durability).
Hard PVC: Premium Durability for Extended Use
Hard PVC badges are rigid plastic credentials similar to credit cards. They’re the most durable option, capable of lasting weeks or months without visible wear. This makes them suitable for events where badges serve as ongoing access credentials, such as month-long training programs or seasonal festival passes.
The material is non-sustainable. PVC isn’t biodegradable, and recycling options are limited. Cost is higher than laminated alternatives, typically $3-$5 per badge. These badges also require specialized printing equipment, limiting flexibility for on-demand printing.
Choose hard PVC only when durability is the primary concern and sustainability isn’t a consideration. This includes events lasting more than one week, badges that attendees will keep as souvenirs, or credentials that need to withstand harsh outdoor conditions (such as multi-day music festival badges).
For most conferences and professional events, hard PVC is unnecessary. Firm laminate branded badge stock offers sufficient durability at a lower cost and with a lower environmental impact.
👍Quick Rule of Thumb on Badge Materials:
Use paper badge stock only for events under 4 hours, firm laminate branded badge stock for 1 to 3-day conferences (the default for most professional events), and hard PVC for 3+ day events, outdoor programs, or anywhere badges need to survive heavy use.
Step 3: Determine Your Badge Size
Badge size affects readability, comfort, and compatibility with standard holders and lanyards. While custom sizes are technically possible, sticking to standard dimensions ensures your badges work with widely available accessories and printing templates.
The two most common badge sizes are 4″ x 6″ (vertical) and 4″ x 3″ (horizontal). The 4″ x 6″ format is the standard for professional conferences and trade shows. It provides enough space for a large first name, a company name, a QR code, a session schedule, and sponsor recognition, while fitting comfortably on a neck lanyard. The vertical orientation also keeps the name front and center when the badge is worn at chest height.
When to Use the 4″ x 3″ Horizontal Format
The smaller horizontal badge is a good fit for compact events such as internal meetings, training days, and workshops, where the badge only needs to carry a first name, company name, and a QR code. It’s also common at smaller membership gatherings where attendees already know each other, and the badge functions mainly as a check-in credential.
Avoid custom badge sizes unless you have a specific reason for a non-standard format. Non-standard sizes limit your holder and lanyard options, complicate printing workflows, and rarely improve attendee experience. Both 4″ x 6″ and 4″ x 3″ are supported by standard badge design tools and onsite printing methods, including EventMobi’s Badge Designer and BadgeON™ check-in and badge printing software solution for on-demand, onsite label printing.
Step 4: Select a Conference Badge Design Tool
Badge design tools range from general graphic design software to purpose-built event platforms. The right choice depends on whether you’re creating a one-time design or generating hundreds of customized badges with variable attendee data.
General design tools like Adobe Illustrator or Canva can be used to create the visual template. You can control every design element, precisely match brand guidelines, and export high-resolution files for printing. The limitation appears when you need to add attendee-specific information. These tools don’t connect to registration databases, forcing you to manually enter each name, company, and QR code. This approach is impractical for events with more than 20 attendees.
Purpose-built badge design platforms solve the data integration challenge. Tools like EventMobi’s Badge Designer connect directly to your registration system, automatically pulling attendee information and generating unique QR codes for each credential. You design the template once, and the software creates individualized badges for every registrant.
This integration eliminates manual data entry and the errors that come with it. When an attendee updates their registration information, the change is automatically reflected in their badge design. If someone registers on-site, their badge is generated immediately with all the correct information.
Look for badge design software that offers:
1. A direct integration with your registration platform
2. Customizable templates that follow design best practices, support for variable data fields (names, companies, QR codes),
3. Export options compatible with your chosen printing method.
EventMobi’s Badge Designer comes with templates and settings built for every printing method, so your design hits the badge looking exactly like it did on screen.
The right tool depends on your printing path: pick software that supports the specific method you chose in Step 1, syncs with your registration system, and generates files your printer can read without manual fixes.
Step 5: Design Your Event Badges
Badge design serves one primary purpose: helping attendees identify and connect with each other. Every design choice should support this goal. The most visually impressive badge fails if attendees can’t read names from a conversational distance.
Make First Names Dominant
The attendee’s first name should be the largest text element on the badge. This isn’t a suggestion based on aesthetics but a functional requirement for networking. Research on conference networking shows that attendees need to read first names from approximately six feet away to initiate conversations confidently.
Use a minimum 72-point font for first names. Sans-serif typefaces like Arial, Helvetica, or Open Sans provide the clearest readability. Avoid script fonts, condensed typefaces, or anything that sacrifices legibility for style.
Last names should be visible but secondary, typically 48-60 points. Company names and job titles can drop to 36-48 points. This hierarchy ensures the information most critical for starting a conversation is immediately visible.
Create High Contrast for Visibility
Text must contrast sharply with the background. Black text on white backgrounds provides maximum readability. Dark text on light backgrounds works well. Avoid light text on dark backgrounds unless you’re using very large font sizes, as this combination reduces readability distance.
Test your design by viewing it from six feet away in various lighting conditions. If you need to squint or move closer to read the first name, increase the font size or adjust the contrast.
Use White Space Strategically
Resist the temptation to fill every inch of badge space. White space (empty areas around text and design elements) improves readability by reducing visual clutter. It guides the eye to important information and makes the badge feel more professional.
A common mistake is cramming sponsor logos, event branding, and attendee information into a small space. This creates a cluttered appearance, making everything harder to read. If sponsors require logo placement, keep logos small (no more than 1 square inch) and position them at the bottom or edges of the badge where they won’t interfere with name visibility.
Watch the EventMobi Product Tour to learn how to create the best guest arrivals experience for your attendees.
Add Networking Prompts
Beyond basic identification, badges can include creative elements that spark conversations. Consider adding: an industry sector or area of expertise, an “I’m here to discuss” field where attendees specify their interests, preferred pronouns, or social media handles for digital connection.
These elements should be clearly labelled and positioned below the primary identification information. They add value without compromising the badge’s core function of clearly displaying names.
Use the Back of the Badge
If your badge material and lanyard attachment support double-sided printing, use the back for supplementary information. The front should focus exclusively on attendee identification and networking facilitators. The back can include: event schedule highlights, venue maps, Wi-Fi credentials, or emergency contact information.
This separation keeps the front clean and readable while providing practical information attendees need throughout the event. Use a QR code that links to the event app or straight to the agenda rather than printing detailed agendas on the badge itself.
A well-designed badge still fails if the production path can’t handle onsite reality. The three printing methods introduced earlier each make very different demands on your team. Here’s how to choose based on the operational load you’re willing to carry.
Step 6: Understand Your Badge Production Options (and What Each Demands Operationally)
When it comes to producing badges, most teams are choosing between three methods: preprinting every badge off-site, onsite label printing on pre-branded stock, or direct thermal printing that generates the whole badge from scratch. On paper, they look interchangeable. Operationally, especially once walk-ins, misspellings, and VIP additions show up, they’re very different.
Pre-Printing Conference Badges: Highest Setup Effort, Most Organizational Overhead
Pre-printed badges feel tidy: order weeks ahead and distribute at check-in. In practice, it’s the most labour-intensive path. Boxes often arrive unalphabetized, so your team sorts them manually into A–E, F–J, K–O, P–T, U–Z piles across long tables on-site. You also need a contingency workflow for every attendee whose badge isn’t in the box: walk-ins, name corrections, misspellings, VIP additions, and speaker swaps. That usually means a secondary correction station with a laptop, a small printer, blank stock, and a trained staffer. It’s the option that requires the most hands-on time before a single attendee arrives.
On-Demand Onsite Badge Printing: Operationally the Simplest
Onsite label printing (iPad, label printer, and pre-branded badge stock) is the lightest operational lift of the three. Setup is: place the kiosk, run a basic test print, confirm scanning, and you’re ready to go. No pre-event alphabetizing. No correction station. No 10% over-order. Walk-ins, misspellings, and VIPs are handled the same way as every other check-in: scan, confirm, print. Because each badge is generated on demand from live registration data, pre-event QA collapses into a single sanity check on the morning of. Onsite label printing (EventMobi’s BadgeON™ software and portable printing station is one popular example) scales cleanly from a 200-person workshop to a 5,000-person conference without adding operational complexity.
Direct Thermal Printing: Built for Volume, Priced for It Too
Direct thermal printers produce the entire badge onsite with no pre-branded stock. The right use case is narrow but real: very large trade shows and consumer shows (think 5,000+ attendees arriving in concentrated waves), where throughput and fully customized credentials like access tiers, session printing, and sponsor-variable layouts genuinely require dedicated hardware at every station. Because printer technology is complex, setup and live-event support aren’t tasks your team can own. Vendors typically require an onsite technician to configure, calibrate, and staff the printers through the event. That’s why thermal is almost always the most expensive option: specialist day rates, travel, and higher per-badge costs stack on top of the hardware rental. For standard conferences, summits, and association events, on-demand onsite badge printing delivers the same attendee experience at a fraction of the complexity and cost.
The Short Version
If your credentials are standard and you want the least overhead before and during the event, onsite label printing is the default. Pre-printing pays off only when badges need to be shipped to attendees in advance. Direct thermal is a specialist tool; reach for it only when the design truly requires it.
Step 7: Make Badge Pickup Feel Like a Red Carpet Moment
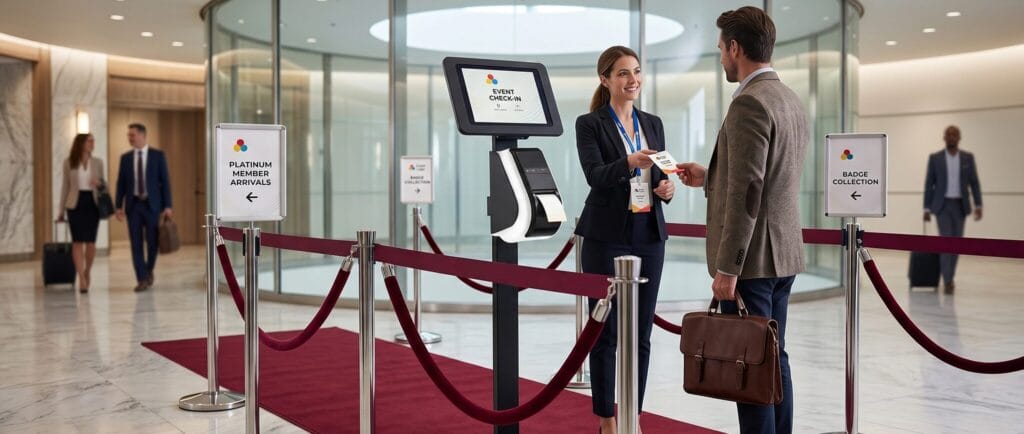
Check-in is the first moment your event becomes real for attendees. Badge pickup sets the tone for everything that follows. A calm, welcoming check-in experience gives people momentum into the day. A chaotic one does the opposite, and the mood lingers.
Create Clear Signage and Flow
Attendees should understand the check-in process immediately upon arrival. Use large, visible signage that directs people to the correct station based on their last name or registration status. Distinguish between pre-registered attendees and walk-ins, as these groups require different processing times.
Physical barriers (stanchions, tape lines, or furniture) guide traffic flow and prevent crowding. Create a clear path from entry to badge pickup to the event space, eliminating confusion about where to go next.
Plan for the Wave, Not the Trickle
Check-in volume isn’t evenly distributed. Most attendees arrive 30-45 minutes before the event starts. Staff your check-in area for this peak period, not for the average arrival rate throughout the day. It’s better to have extra staff standing idle for the final hour of registration than to have long lines during the critical opening period.
Train check-in staff on common issues: how to handle misspelled names, what to do when someone’s badge is missing, and how to process walk-in registrations. Staff should be empowered to solve simple problems without escalating to a manager.
Use Technology to Reduce Friction
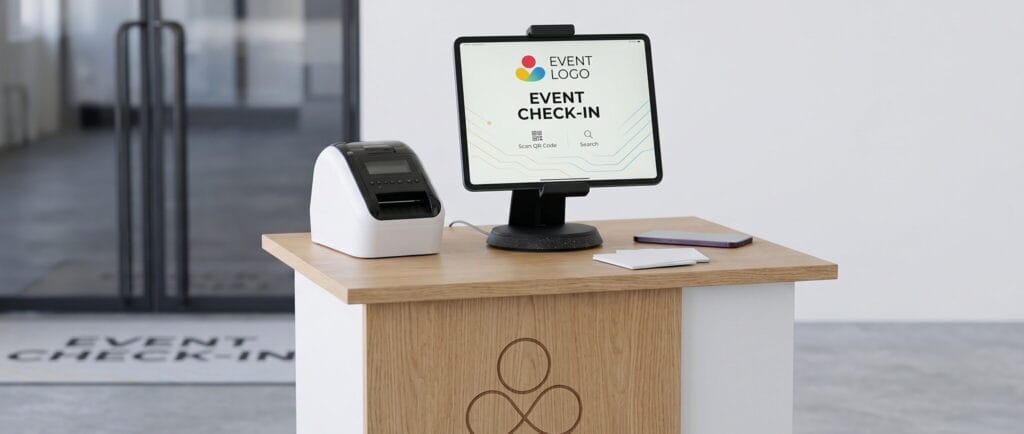
Self-service check-in stations work well for both tech-savvy and non-tech-savvy audiences. Attendees simply scan their registration QR code, confirm their information on screen, and receive their printed badge without staff interaction. This approach requires reliable technology and clear instructions, but can significantly reduce wait times.
Check-In Is the Opening Act. Treat It That Way
From the moment attendees walk in, the experience has already begun. A welcome message on screen, a branded photo moment, a friendly face pointing people in the right direction: these small touches signal that this experience was designed with care.
When logistics run invisibly, with badges ready, names found instantly, and walk-ins handled without a fuss, your staff can focus on making people feel genuinely welcome, not just efficiently processed.

Book your EventMobi demo today for expert advice and learn how EventMobi can help you create the right check-in experience for your events.
Frequently Asked Questions
